OMHCTF2021 - Flag saver, GRUB writeups
Flag saver
Introduction
- Given files: ScreenSaver.scr, screenshot.png.
- Description:
We think one of our developers is hiding some secrets. Unfortunately he's using secure screen saver, which makes a jigsaw from the screen! We managed to take a screenshot of the screen when he went to the toilet. We also have a copy of the screen saver. - Category: Reverse engineering
- Summary: A custom Windows screen saver reversing challenge. Our job is to find out what it does and reconstruct the actual screenshot from the screen saver screenshot.
- Take a look at the screenshot.png -> It seems like it’s a screenshot that is splitted up into pieces of the same size and shuffled around.
- Analyze ScreenSaver.scr -> A Windows screen saver file is actually a .NET executable, use a .NET decompiler of your choice to analyze.
- Analyze the 2 main forms:
SettingFormandScreenSaverForm-> Learn thatSettingFormis to set how many pieces, andScreenSaverFormis where the actual shuffling logic is implemented. - Analyze shuffling logic -> Learn that it uses simple number generator to select pairs of pieces to swap.
- Reimplement the swapping logic -> swap backwards to recover the actual screenshot.
Analyzing the ScreenSaver file
First and foremost, I took a quick look at the given screenshot. It looks like it’s just a normal screenshot that is splitted into small rectangles of the same size and scrambled around. This fits the description of the challenge, which stated it’s “a jigsaw from the screen”. Therefore, it is almost certain that our goal is to unscramble this screenshot and the flag will appear somewhere on the screen.
The challenge gives us a .scr file, which is a screen saver file used by Microsoft Windows. This was my first time working with this kind of file, so I threw it into a hex editor to find out what it looks like. I found out that there is the bytes MZ in the header of the file, which means it’s likely to be an actual Windows executable. After some quick googling, I knew that this is a .NET executable, so I just used a .NET decompiler of choice (my preference is Telerik JustDecompile, but ILSpy or DNSpy works just as well).
The file decompiled cleanly, which was a relief. It has 4 classes:
LCGProgramScreenSaverFormSettingsForm
The program’s entrypoint is in the class Program. The main method is actually just to parse the arguments to decide if it should run SettingForms or ScreenSaverFrom, so those are my next target:
//...
if (str == "/c")
{
  Application.Run(new SettingsForm());
  return;
}
if (str == "/p")
{
  if (str1 != null)
  {
      Application.Run(new ScreenSaverForm(new IntPtr(long.Parse(str1))));
      return;
  }
  MessageBox.Show("Missing handle!", "FlagSaver", MessageBoxButtons.OK, MessageBoxIcon.Exclamation);
  return;
}
if (str == "/s")
{
  Program.ShowScreenSaver();
  Application.Run();
  return;
}
//...
Analyzing the 2 forms
The SettingsForm is quite simple, all it does is creating a TextBox to get an integer value from the user, and then save it in the registry key SOFTWARE\FlagSaver, under the value text. It can also load the saved value from the key as well:
private void LoadSettings()
{
   RegistryKey registryKey = Registry.CurrentUser.OpenSubKey("SOFTWARE\\FlagSaver");
   if (registryKey == null)
   {
       this.textBox.Text = "256";
       return;
   }
   this.textBox.Text = (string)registryKey.GetValue("text");
}

private void SaveSettings()
{
   Registry.CurrentUser.CreateSubKey("SOFTWARE\\FlagSaver").SetValue("text", this.textBox.Text);
}
However, up to this point, we still have no information on where this value is used, so let’s just continue with ScreenSaverForm. This class is where most of the logic is implemented. The first notable method is LoadSettings(), where it literally just loads the text value saved in SettingsForm and stored it in a property called this.pieces. By the name of it, it looks like the settings is just to set how many pieces does the user want to split the screen up into when the screen saver runs.
The method that registers the screen saver is ScreenSaverForm_Load(), which has some notable points such as:
- The screenshot before going into screen saving is only captured once with
this.screenCapture = this.TakeScreenShot();. - The tick rate is set to 3000 ms, the event that happens on each tick is defined by the method
MoveTimer_Tick().
In MoveTimer_Tick(), a bitmap of size this.pieces x this.pieces is created from the this.screenCapture, then it is shuffled by bitmap = this.ShuffleArray(bitmap);. Finally, it just draws the shuffled bitmap on the screen. Therefore, if we can reverse ShuffleArray, we can reconstruct the actual screenshot from the screen saver screenshot.
Analyzing the shuffling logic
This is the shuffling logic:
private Image[] ShuffleArray(Image[] imgarray)
{
    int num = this.pieces * this.pieces;
    LCG lCG = new LCG(this.lcg.NextValue(), (long)65537);
    for (int i = 0; i < this.pieces; i++)
    {
        for (int j = 0; j < this.pieces; j++)
        {
            long num1 = lCG.NextValue() % (long)num;
            long num2 = lCG.NextValue() % (long)num;
            Image image = imgarray[checked((IntPtr)num1)];
            imgarray[checked((IntPtr)num1)] = imgarray[checked((IntPtr)num2)];
            imgarray[checked((IntPtr)num2)] = image;
        }
    }
    return imgarray;
}
It uses the class LCG, which I had not taken a look at yet. But what this method basically does is looping this.pieces ^ 2 times, with each loop, it takes 2 numbers from lCG, and then swap the position the 2 pieces with the corresponding indices in the imgarray. Knowing this, we can easily rearrange the screen saver screenshot to the original one by swapping it in the reverse order. Time to look at LCG to see how numbers are generated:
internal class LCG
{
    private long seed = (long)51966;

    private long modulus = (long)65537;

    private long a = (long)57005;

    private long c = (long)48879;

    public LCG(long seed, long modulus)
    {
        this.seed = seed;
        this.modulus = modulus;
    }

    public long NextValue()
    {
        this.seed = (this.a * this.seed + this.c) % this.modulus;
        return this.seed;
    }
}
Nothing complicated here, it’s just basic arithmetic operations on hard-coded numbers. Note that in ShuffleArray, there are 2 instances of LCG, which are lcg and lCG. lcg is a global instance that is instantiated together with ScreenSaverForm: private LCG lcg = new LCG((long)51966, (long)128), and lCG is a local instance that is instantiated with the seeds coming from lcg. Now I had all the information about the shuffling process, I could basically just rewrite the methods to get the list of all the indices that are swapped, then swap them in the reverse order.
Reimplementing swapping logic
First, I wanted to split up the given scrambled screenshot into an array of small pieces. We don’t know how many pieces did the author set with SettingsForm, but we can just simply count it from the given screenshot. It is a 1920x1080 resolution screen, with 120x120 pieces, which makes each piece a 16x9 rectangle. I splitted it using python Pillow:
M = 16
N = 9
im = Image.open("screenshot.png")
imgarray = [im.crop((x, y, x+M, y+N)) for x in range(0, im.size[0], M) for y in range(0, im.size[1], N)] # column by column
Note that I didn’t know if Windows stores these pieces in the flat array row by row or column by column, so I just tried both out to see which works (it’s column by column btw). After that, I reimplemented LCG and ShuffleArray to get the list of swapped indices:
class LCG:
    def __init__(self, seed, modulus):
        self.seed = seed
        self.modulus = modulus
        self.a = 57005
        self.c = 48879

    def next_value(self):
        self.seed = (self.a * self.seed + self.c) % self.modulus
        return self.seed


pieces = 120
lcg = LCG(51966, 128)
shuffle_list = []


def shuffle():
    result = []
    num = pieces * pieces
    lCG = LCG(lcg.next_value(), 65537)
    for i in range(pieces):
        for j in range(pieces):
            num1 = lCG.next_value() % num
            num2 = lCG.next_value() % num
            result.append((num1, num2))
    return result


for i in range(10):
    shuffle_list.append(shuffle()[::-1]) # Get the reversed order swapping list
Since I didn’t know at which tick did the screenshot get taken, so I simply tried to bruteforce it, starting with 10 ticks. Finally, I could just rearrange the pieces, and merge them back into the original image:
def rearrange_one_tick(a, s):
    for i in range(len(s)):
        tmp = a[s[i][0]]
        a[s[i][0]] = a[s[i][1]]
        a[s[i][1]] = tmp
    return a

def save_image(a, n):
    new_im = Image.new('RGBA', (1920, 1080), (255, 255, 255, 255))
    for i in range(len(a)):
        offset = ((i // pieces) * M, (i % pieces) * N)
        new_im.paste(a[i], offset)
    new_im.save("./results/result_{}.png".format(n))

def rearrange(tick_cnt):
    newarray = deepcopy(imgarray)
    new_array = rearrange_one_tick(newarray, shuffle_list[tick_cnt - 1])
    save_image(newarray, tick_cnt)


for i in range(1, 10):
    rearrange(i)
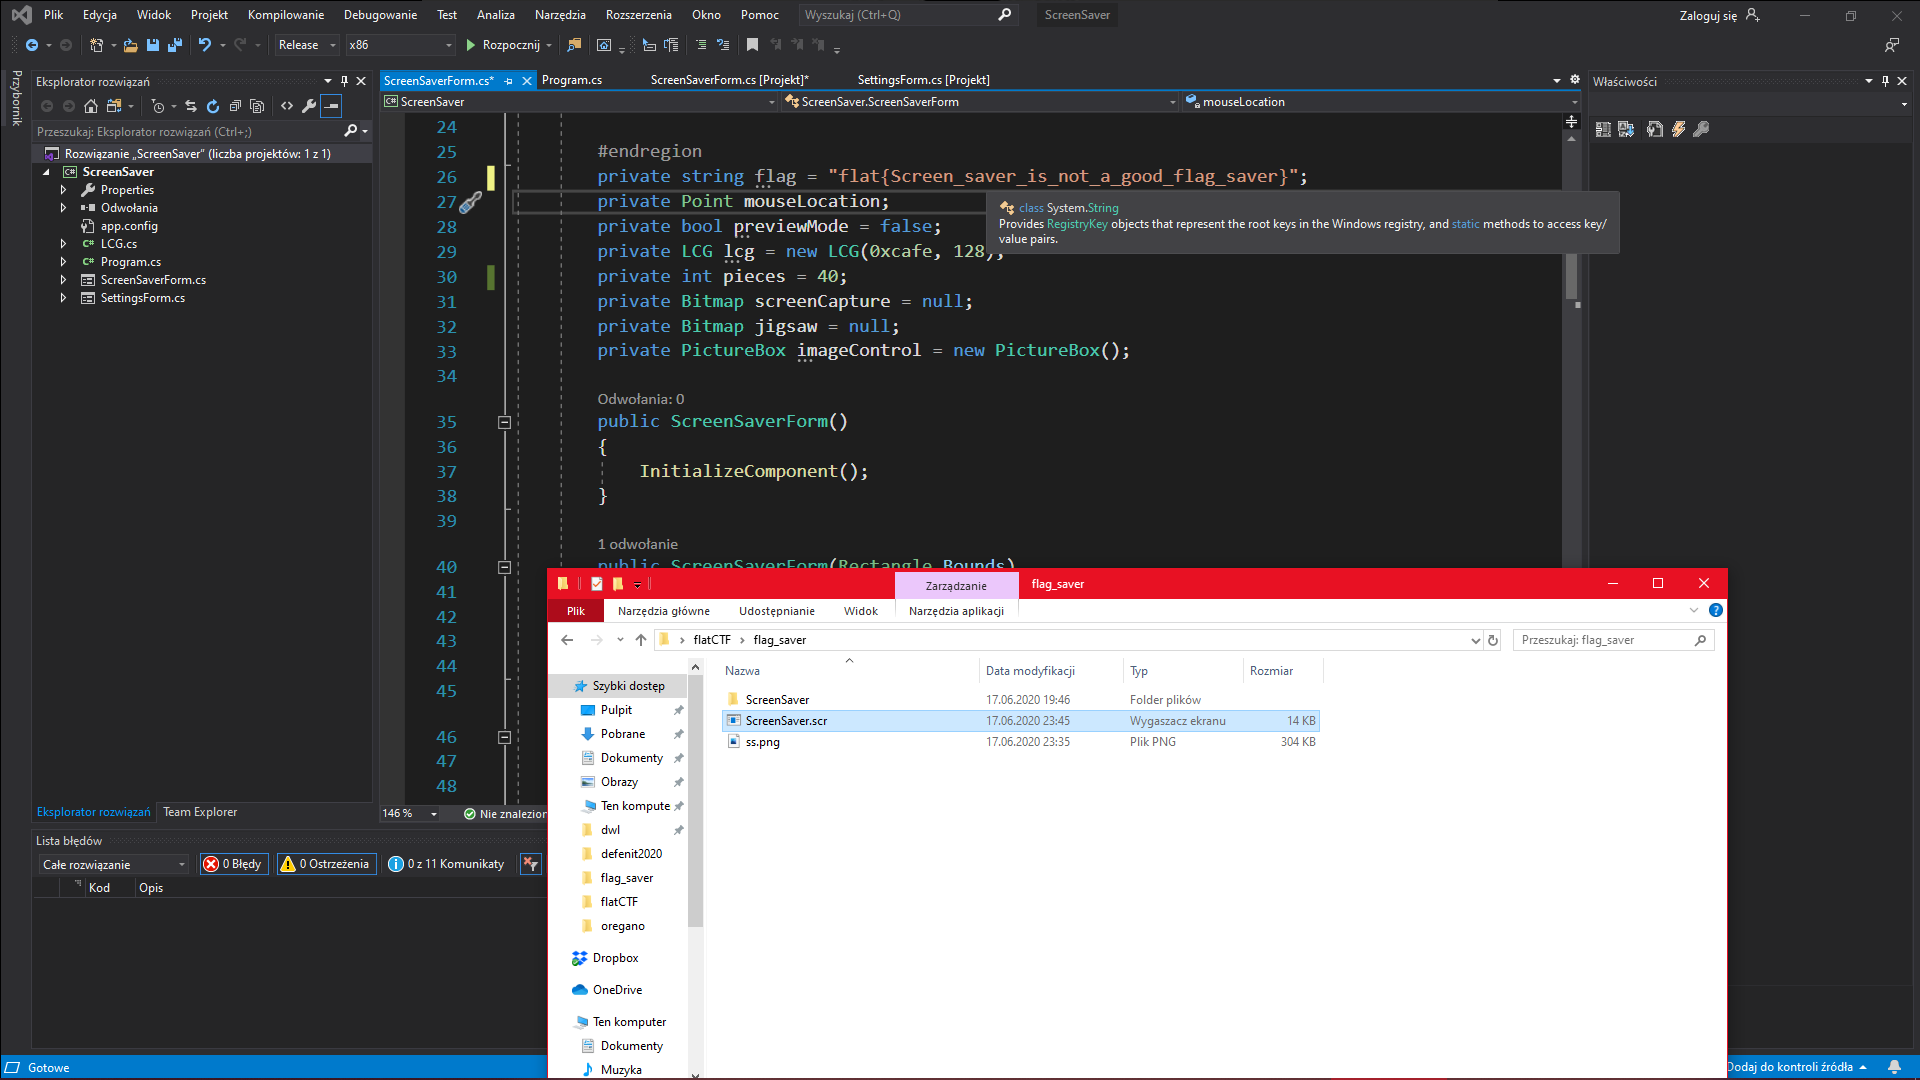
Fortunately, the author is nice, and the screenshot is taken at the 2nd tick only, the flag is:
flat{Screen_saver_is_not_a_good_flag_saver}
Appendix
The solution script is a.py.
The resulting image is result_2.png.
GRUB
Introduction
- Given files: grub.iso.
- Description:
Huh. This GRUB password lock seems... different. Do you think you could bypass it? - Category: Reverse engineering
- Summary: This challenge gives us a
GRUBiso image. Its password protection is checked with a shell script that contains a lot of regular expression checks. Our goal is to find a correct password that satisfies all the checks.
- Mount grub.iso -> Find a
grub.cfgfile that contains the password checking logic. - Analyze the checking logic -> Learn that it uses
regexpto make alot of regular expression assignments/checks. - Simplify the regex checks into normal logical equations -> use
z3to solve them.
About grub.iso
GRUB is a bootloader package from GNU, which provides a user the choice to boot one of multiple operating systems installed on a computer or select a specific kernel configuration available on a particular operating system’s partitions. The iso file that is given to us is actually a GRUB boot image. We can mount the image to see what’s inside using this command on a Linux environment:
sudo mount -o loop grub.iso tmp
With tmp being an empty directory, or a mount point. By the time I started working on this challenge, my teammate @pickaxe already mounted it and extracted a file called grub.cfg, where all of the checking process is executed.
About regexp
As we can see, grub.cfg is literally just a shell script that uses a lot of regexp to perform variable assignments and checks. I struggled for a bit because there is no regexp to be found on my Linux machine, but turned out it was just a GRUB command that is documented here. What special about it is not only that it can match a string with a regular expression, it can also set the matched part into another variable. For example, the first check in grub.cfg:
regexp --set a "^p4\{([0-9A-Q]{54})\}\$" "$flag"
So this first check is the flag format check, the flag must starts with p4{, end with }, and its body must contains exactly 54 characters, which must only be digits from 0 to 9, or uppercase letters from A to Q. The --set option makes it so that the matching part inside the parentheses ([0-9A-Q]{54}) will be assigned to the variable a (the parts in parentheses are usually called “groups” in regex). At the end of this command, if our flag doesn’t match, it will halt, otherwise it will assign the body of the flag (the part between the curly braces) to a and continue.
The first 2 mappings
Next up is 2 large while loops. They look menacing, but there is nothing to them, really. The first loop match the first character of a with all the possible characters for the flag body. If it doesn’t match, nothing happends, otherwise b will be concatenated with a unique sequence for each character, and a will be set to the remaining part. For example:
if regexp --set a "^0(.*)\$" "$a"; then b="${b}aaa"; fi
In regex ^ at the start of the expression means matching from the start of the string, not in between. This will match the first character of a with 0, if it matches, the group (.*) following 0, which means any sequence after 0 will be reassigned to a. This can be rewritten in python as follow:
b = ""
for i in range(0, len(a)):
    if a[i] == "0":
        b += "aaa"
    elif a[i] == "1":
        b += "aab"
    elif ...
...
The next loop is basically the same, this time mapping b to c, it’s logic is as follow:
c = ""
for i in range(0, len(b), 2):
    if b[i:i+2] == "aa":
        c += "R"
    elif b[i:i+2] == "ab":
        c += "S"
    elif ...
...
Note that because a is 54 bytes long, b will be 162 bytes and c will be 81 bytes. Also, c only contains uppercase characters from R to Z. Because a to b to c are all one-to-one mappings, we can just solve for c and then map back to a.
The function t
The first major function for the checking is called t. This function takes 1 parameter, which is a string contains integers separated by commas. The first regexp in t:
regexp --set 1:C --set 2:B "^([0-9]*),(.*)" "$B"
B is initialized as $1, which is the parameter. This regex matches 2 groups: ([0-9]*) before the comma, and (.*) after the comma. Basically it takes the first number before the first comma in the parameter and assigns it to C, then the rest of the parameter after the comma is reassigned to B. This is all in a while loop to loop through all the numbers in the parameter. The next regexp:
regexp --set D "^.{$C}(.)" "$c"
In regex, the number inside the curly brackets is the quantifier for the token preceding it, matching the corresponding amount of that token. For example a{4} means matching four consecutive a. In this case, we have .{$C}, which means match any C consecutive characters. The character after that is in a group (.), this character will be assigned to D. If you think about it, this expression is basically just D = c[C]. D is then concatenate to A, which is initialized as an empty string.
Finally after the loop, we have this match:
regexp "^R?S?T?U?V?W?X?Y?Z?\$" "$A"
The ? token means that it matches 0 or 1 occurrence of the preceding token. So in this case it means that our A string must contains characters in an ascending order. Therefore, in conclusion, a call to t "51,50,49,48," is equivalent to saying c[51] < c[50] < c[49] < c[48]. The checks done by t can be easily rewritten in z3:
def t(arr):
    for i in range(len(arr) - 1):
        s.add(c[arr[i]] < c[arr[i+1]])

t([27,18,9,0,1,2,11,10])
t([59,50,41,32,40,48])
t([51,50,49,48])
t([6,7,8,17,26])
t([54,64,74,66,76])
t([79,80,70])
The function u
The next major check is u. It also takes a string as a parameter, but this time the string is the regular expression itself. The first regexp in u:
regexp --set 1:R --set 2:S --set 3:T --set 4:U --set 5:V --set 6:W --set 7:X --set 8:Y --set 9:Z "$1" "$c"
A="$R$S$T$U$V$W$X$Y$Z"
This sets a total of 9 variables R to Z using regexp, then concatenate them into A. The string to match with is our c, and the expression is the parameter. We can take a look at all the parameters and see that they all have 9 groups containing 1 character (.) in them, corresponds to 9 variables. So A is just 9 characters taken from c and concatenate together. The next series of regexp, starting with regexp R $A basically just means that “is the character R in A or not” (in shell script, a character without quotes like R is the same as with quotes "R"). A total of 9 checks means that 9 characters of A must be unique. I rewritten this in z3 (a little bit lazy and hackish by me, but it works):
def u(r):
    i = 0
    j = 0
    x = []
    while i < len(r):
        if r[i] == '.':
            if r[i+3] == '}':
                off = int(r[i+2])
                j += off
                i += 4
            else:
                off = int(r[i+2:i+4])
                j += off
                i += 5
        elif r[i] == '(':
            x += [c[j]]
            j += 1
            i += 3
    for i in range(82, 91):
        cond = False
        for j in range(len(x)):
            cond = Or(cond, x[j] == i)
        s.add(cond)


u("(.)(.)(.)(.)(.)(.)(.)(.)(.)")
u(".{9}(.)(.)(.)(.)(.)(.)(.)(.)(.)")
u(".{18}(.)(.)(.)(.)(.)(.)(.)(.)(.)")
u(".{27}(.)(.)(.)(.)(.)(.)(.)(.)(.)")
u(".{36}(.)(.)(.)(.)(.)(.)(.)(.)(.)")
u(".{45}(.)(.)(.)(.)(.)(.)(.)(.)(.)")
u(".{54}(.)(.)(.)(.)(.)(.)(.)(.)(.)")
u(".{63}(.)(.)(.)(.)(.)(.)(.)(.)(.)")
u(".{72}(.)(.)(.)(.)(.)(.)(.)(.)(.)")
u("(.).{8}(.).{8}(.).{8}(.).{8}(.).{8}(.).{8}(.).{8}(.).{8}(.)")
u(".{1}(.).{8}(.).{8}(.).{8}(.).{8}(.).{8}(.).{8}(.).{8}(.).{8}(.)")
u(".{2}(.).{8}(.).{8}(.).{8}(.).{8}(.).{8}(.).{8}(.).{8}(.).{8}(.)")
u(".{3}(.).{8}(.).{8}(.).{8}(.).{8}(.).{8}(.).{8}(.).{8}(.).{8}(.)")
u(".{4}(.).{8}(.).{8}(.).{8}(.).{8}(.).{8}(.).{8}(.).{8}(.).{8}(.)")
u(".{5}(.).{8}(.).{8}(.).{8}(.).{8}(.).{8}(.).{8}(.).{8}(.).{8}(.)")
u(".{6}(.).{8}(.).{8}(.).{8}(.).{8}(.).{8}(.).{8}(.).{8}(.).{8}(.)")
u(".{7}(.).{8}(.).{8}(.).{8}(.).{8}(.).{8}(.).{8}(.).{8}(.).{8}(.)")
u(".{8}(.).{8}(.).{8}(.).{8}(.).{8}(.).{8}(.).{8}(.).{8}(.).{8}(.)")
u("(.)(.)(.).{6}(.)(.)(.).{6}(.)(.)(.)")
u(".{3}(.)(.)(.).{6}(.)(.)(.).{6}(.)(.)(.)")
u(".{6}(.)(.)(.).{6}(.)(.)(.).{6}(.)(.)(.)")
u(".{27}(.)(.)(.).{6}(.)(.)(.).{6}(.)(.)(.)")
u(".{30}(.)(.)(.).{6}(.)(.)(.).{6}(.)(.)(.)")
u(".{33}(.)(.)(.).{6}(.)(.)(.).{6}(.)(.)(.)")
u(".{54}(.)(.)(.).{6}(.)(.)(.).{6}(.)(.)(.)")
u(".{57}(.)(.)(.).{6}(.)(.)(.).{6}(.)(.)(.)")
u(".{60}(.)(.)(.).{6}(.)(.)(.).{6}(.)(.)(.)")
u("(.).{9}(.).{9}(.).{9}(.).{9}(.).{9}(.).{9}(.).{9}(.).{9}(.)")
u(".{8}(.).{7}(.).{7}(.).{7}(.).{7}(.).{7}(.).{7}(.).{7}(.).{7}(.)")
Solving the equations
That’s all the checks in grub.cfg, we can just let z3 do it work now and get the solution for c. After that, simply map it back to b and then to a:
if s.check() == sat:
    model = s.model()

    c_res = [model[c[i]].as_long() for i in range(LEN)]
    b = ""
    a = ""

    d1 = {'R':'aa', 'S':'ab', 'T':'ac', 'U':'ba', 'V':'bb', 'W':'bc', 'X':'ca', 'Y':'cb', 'Z':'cc'}
    d2 = {'aaa':'0', 'aab':'1', 'aac':'2', 'aba':'3', 'abb':'4', 'abc':'5', 'aca':'6', 'acb':'7', 'acc':'8', 'baa':'9',
            'bab':'A', 'bac':'B', 'bba':'C', 'bbb':'D', 'bbc':'E', 'bca':'F', 'bcb':'G', 'bcc':'H', 'caa':'I', 'cab':'J',
                'cac':'K', 'cba':'L', 'cbb':'M', 'cbc':'N', 'cca':'O', 'ccb':'P', 'ccc':'Q'}

    for i in c_res:
        b += d1[chr(i)]

    for i in range(0, len(b), 3):
        a += d2[b[i:i+3]]

    print('p4{' + a + '}')


else:
    print("unsat")
The flag is:
p4{DOO73LBP6EI461D6HP3N2MM6M953PKJ8MK1A2BGAB8FCIQE9Q4B96E}
Appendix
The solution script is a.py.